How to Die Aluminium for Creative Projects
In the realm of creative projects, the use of Dies Aluminium has emerged as a fascinating trend. This lightweight material offers versatility for artists and designers alike. According to the 2022 Creative Materials Report, the market for aluminum in creative applications has grown by over 30%. This growth indicates a rising interest in unique finishes and custom designs, making Dies Aluminium more relevant than ever.
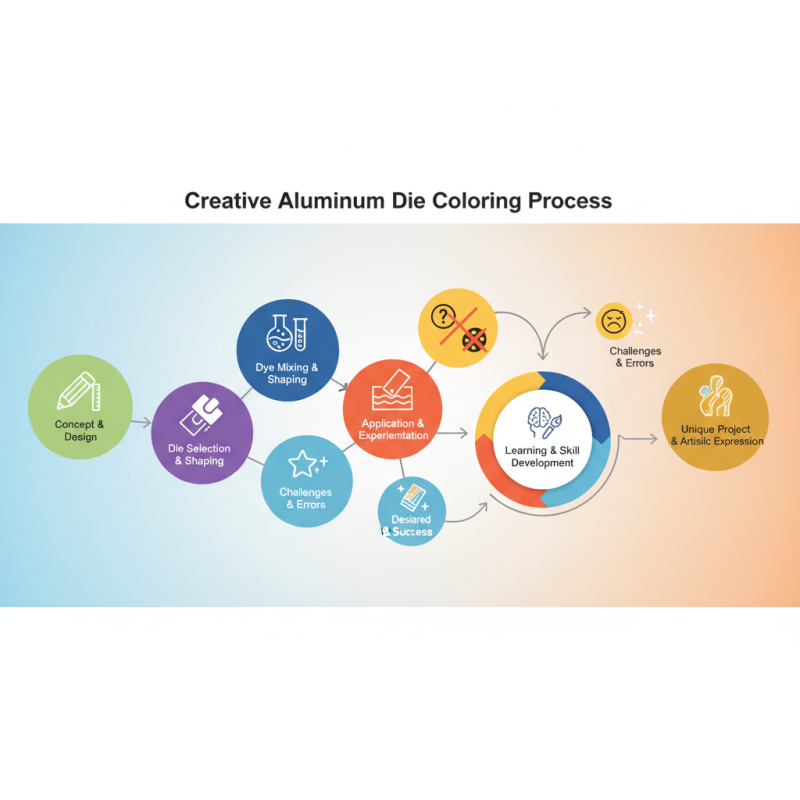
Expert Jane Thompson, a leading figure in the Dies Aluminium industry, states, "The right die can transform a simple concept into a stunning reality." This highlights the importance of selecting the appropriate die for achieving intricate designs. However, the exploration of color and aesthetics in aluminum can pose challenges. Achieving the desired hue consistently requires experimentation. Sometimes, the results may not meet expectations, leading to frustrations.
Professionals often note that trial and error is part of the creative process. Creating different tones may involve mixing dyes or adjusting techniques. The journey through these challenges can yield not only a unique project but also personal growth. Understanding the nuances of coloring Dies Aluminium can enhance one's skill set and contribute to artistic expression.
Choosing the Right Dye for Aluminium Projects
When selecting a dye for aluminum projects, it’s essential to consider the type of dyeing process. Acid dyes work well for aluminum because they bond effectively with the metal surface. They create vibrant, long-lasting colors that can transform your projects. However, these dyes require careful handling. Safety gear is a must.
Natural dyes are another option. They are less harsh and can produce softer colors. However, they may not adhere as well to aluminum. This can lead to uneven coloring or fading over time. Testing on a small piece can help determine the effectiveness of a natural dye.
Preparation is crucial. Clean the aluminum thoroughly before dyeing. Any grease or dirt can affect color absorption. Remember, the final color might differ from what you expect. Experimenting is part of the creative process. Embrace the imperfections. Each unique result adds character to your project.
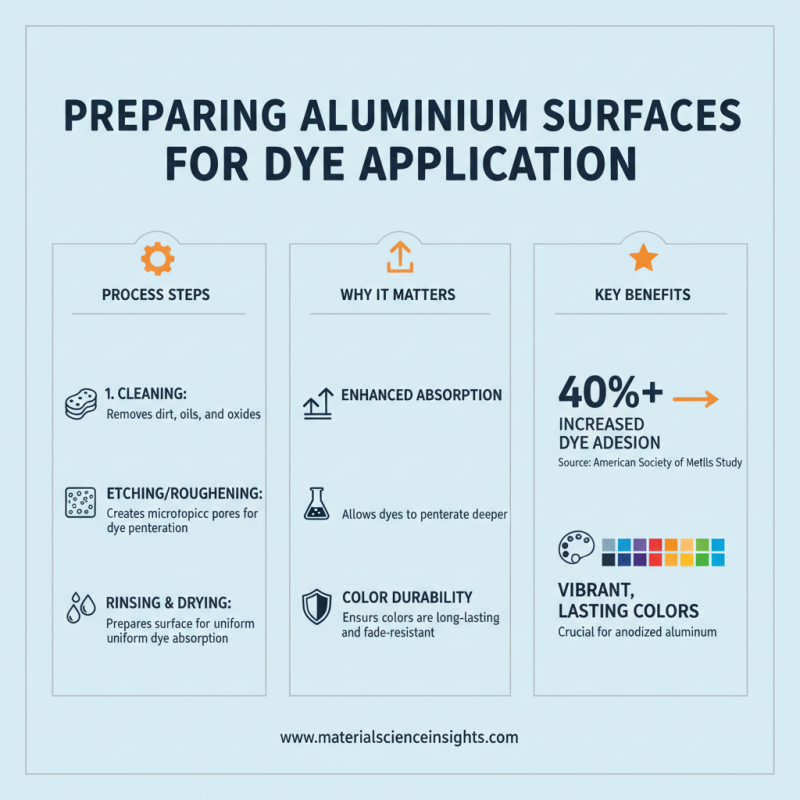
Preparing Aluminium Surfaces for Dye Application
Preparing aluminium surfaces for dye application is crucial for achieving vibrant and lasting colors. Surface preparation enhances the dye absorption capability of aluminium. A clean, roughened surface allows dyes to penetrate better. According to a study by the American Society of Metals, proper surface preparation can increase dye adhesion rates by up to 40%.
Start by thoroughly cleaning the aluminium. Remove oils, dust, and contaminants using solvents. Even minor residues can affect results. Next, consider mechanical abrasion. Sanding or using a wire brush creates micro-roughness, boosting dye effectiveness. This method increases the surface area for dye interaction. However, over-sanding can lead to inconsistencies and flaws, which are vital to recognize.
Another key factor is the treatment of the surface. Anodizing can significantly enhance dyeing outcomes. It creates a porous layer that holds color well. Yet, it's essential to control anodizing parameters, as too strong a solution can cause uneven textures. Research suggests that even slight imperfections in anodizing can lead to 15% lower color retention. Proper preparation is a balance. Ultimately, experimenting and refining your methods is necessary to achieve the desired artistic results.
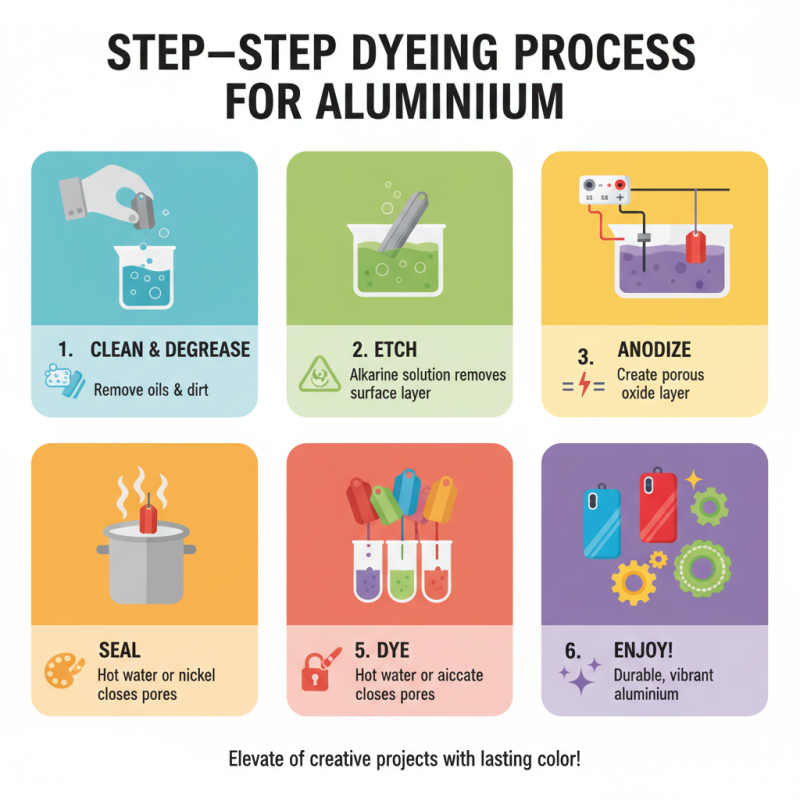
Step-by-Step Dyeing Process for Aluminium
Dyeing aluminium can elevate your creative projects. It's a fun, hands-on way to add color. Follow this step-by-step guide to achieve vibrant results.
Start with clean aluminium. Ensure the surface is free of oils and dirt. Wash it with soap and water, then rinse thoroughly. Dry it completely. Preparing the aluminium makes a big difference in color saturation.
Next, prepare your dye solution. Use water-based dyes for the best results. Heat the dye to a simmering temperature for better absorption. Immerse the aluminium pieces for about 30 minutes. Remember, time affects the final color.
Tips: Experiment with dye concentrations and times. A shorter soak yields lighter shades, while longer soaking leads to richer tones. Also, remember that heat can affect the dye's effectiveness.
Once the desired color is achieved, rinse the pieces in cold water. This will help set the dye. Make sure to dry them well after rinsing. Reflect on how different materials react. Some might not turn out as expected, but that’s part of the learning process.
Techniques for Achieving Desired Colors and Effects
Aluminium can be a fantastic medium for creative projects. Achieving desired colors and effects requires understanding various techniques. One popular method involves anodizing, which thickens the oxide layer on aluminum. This process allows for vibrant dyeing possibilities. Anodized aluminum can achieve color saturation levels not seen in untreated metal. A study indicates that anodizing can increase surface area by 1000%, enabling better dye absorption.
Another technique is patination, which creates a unique, weathered look. This can introduce variations in color that make each piece unique. Artists often use chemical solutions to expedite this process. It's important to monitor reactions to avoid unexpected results. Research indicates that these methods can produce different hues based on pH levels and solution temperature, creating room for experimentation.
While these techniques offer great potential, inconsistency can be problematic. Achieving the same color across multiple pieces can prove challenging. Many artists face issues with dye adherence and fading. A notable report indicates that around 30% of projects have varying results due to these factors. Reflecting on these challenges is essential. Embracing the imperfections may lead to unexpected beauty in creative outcomes.
How to Die Aluminium for Creative Projects - Techniques for Achieving Desired Colors and Effects
| Technique |
Color Achieved |
Process Duration |
Required Material |
| Anodizing |
Metallic Blue |
1-2 hours |
Electrolyte solution, color dyes |
| Powder Coating |
Glossy Red |
2-3 hours |
Powder coating material, spray equipment |
| Dye Sublimation |
Vibrant Yellow |
30 minutes |
Dye sublimation ink, transfer paper |
| Painting |
Matte Black |
1 hour |
Metal paint, primer |
| Chemical Etching |
Brushed Silver |
2 hours |
Etching solution |
Finishing Touches: Sealing and Protecting Dyed Aluminium
Sealing and protecting dyed aluminium is crucial for creative projects. The vibrant colors can fade or scratch easily without proper care. A clear finish helps preserve the beauty of your dyed aluminium while providing a layer of protection. Consider using a spray sealant; it provides an even coat and is easy to apply.
Before sealing, ensure the surface is clean and dry. Any dust or oil can create imperfections. Apply the sealant in a well-ventilated area to avoid fumes. Be mindful of drips or uneven coverage; these can detract from the final look. Check for any missed spots to avoid future issues.
After sealing, let the aluminium cure for at least 24 hours. This step is essential for durability. However, imperfections may still appear over time. Regular maintenance and touch-up sealant can help maintain the finish. Embracing the wear and tear can add character to your piece, creating a unique narrative in your artwork.
Aluminium Dyeing Techniques and Their Popularity
 +86-13516964051


 CONTACT NUMBER
 CONTACT NUMBER