How to Effectively Cast Aluminum Parts: A Step-by-Step Guide
In the world of manufacturing, casting aluminum parts stands as a critical process for producing lightweight and durable components. As industry expert John Adams, a renowned figure in aluminum casting, aptly puts it, "The precision in casting aluminum parts not only determines the quality of the final product but also significantly impacts the overall production efficiency." Mastering the art of casting aluminum parts requires a comprehensive understanding of various techniques, materials, and environmental considerations.
This step-by-step guide aims to provide both novices and seasoned professionals with essential insights into the aluminum casting process. From designing the mold to selecting the right alloy and ensuring optimal casting conditions, each phase plays a pivotal role in achieving high-quality results. By adhering to best practices and thoughtful execution, practitioners can enhance both the performance and longevity of aluminum parts, ultimately driving innovation within their respective fields.
Understanding the intricacies involved in casting aluminum parts is not merely about the technicalities; it's about embracing a mindset of continuous improvement and adaptation. With this guide, we delve into the crucial steps needed to navigate the complexities of aluminum casting and achieve exceptional outcomes that stand the test of time.
Understanding Aluminum Casting: Materials and Equipment Overview
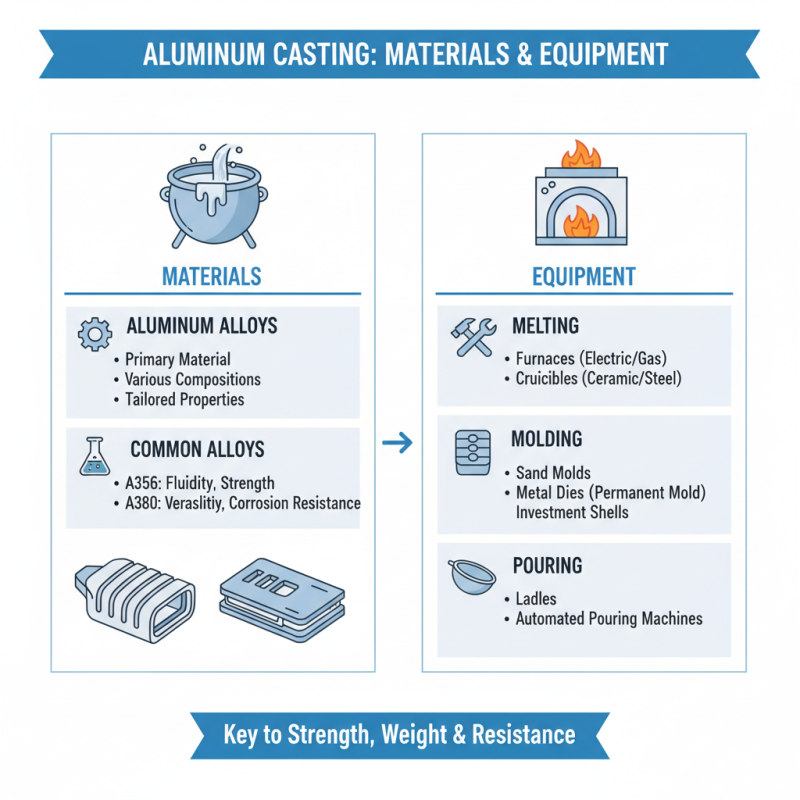
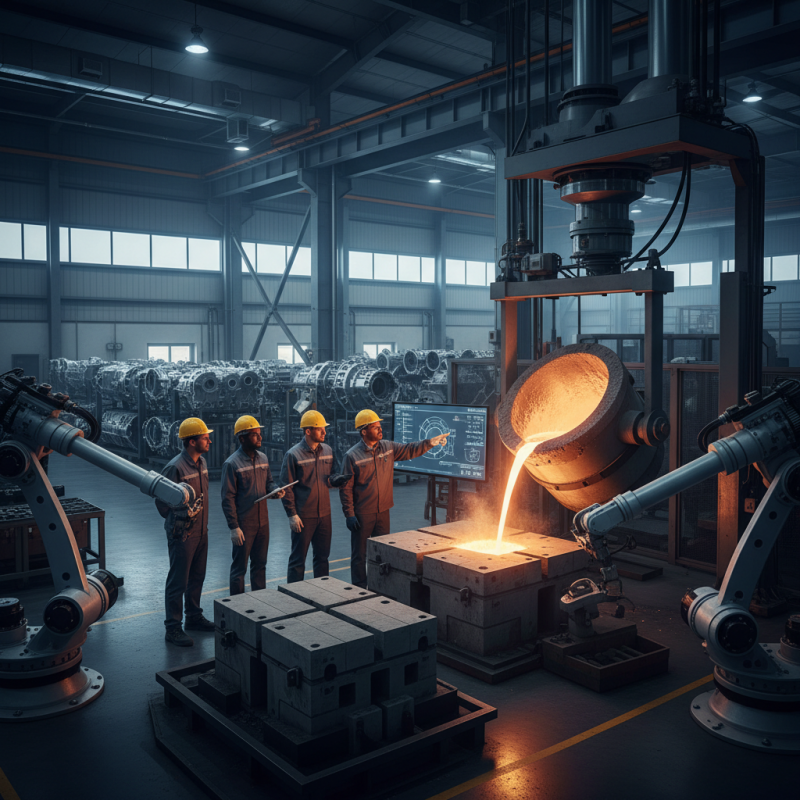
Aluminum casting is a highly versatile manufacturing process that involves pouring molten aluminum into a mold to achieve the desired shape. Understanding the materials and equipment needed for this process is crucial for success. The primary material, aluminum alloys, come in various compositions and properties, tailored to specific applications. Common alloys include A356 and A380, known for their excellent fluidity and mechanical performance. The choice of alloy will significantly impact the final product's strength, weight, and corrosion resistance.
In terms of equipment, several key components are essential for effective aluminum casting. A furnace is necessary to melt the aluminum, with induction and crucible furnaces being popular choices depending on the scale and requirements of the operation. Mold materials can vary too, often using sand, metal, or ceramic, each offering different characteristics in terms of heat tolerance and surface finish. Additionally, tools like ladles and pouring equipment ensure controlled and safe handling of molten aluminum, minimizing oxidation and contamination. By carefully selecting the right materials and equipment, manufacturers can achieve high-quality aluminum castings that meet stringent industry standards.
Preparation Steps for Creating Aluminum Casting Molds
The preparation steps for creating aluminum casting molds are crucial in ensuring the production of high-quality parts. Proper planning and execution are essential, as approximately 60% of casting defects can be traced back to issues in the mold-making process (Source: American Foundry Society). The first step involves selecting the right materials for the mold. Common choices include sand, metal, and ceramic, each offering distinct advantages. For instance, sand molds are widely used due to their cost-effectiveness and ability to produce intricate shapes, while metal molds can provide superior dimensional accuracy and surface finish.
The next step is the design and fabrication of the mold itself. It is important to consider the thermal properties of the mold material, as aluminum has a melting point around 660°C (1,220°F), which can lead to thermal expansion and contraction during the casting process. Accurate mold design can help mitigate warping and enhance the integrity of the final product. According to the foundry industry reports, incorporating technologies such as computer-aided design (CAD) can reduce the time required for mold preparation by up to 30%, while also allowing for more precise outcomes. Proper venting and gating are also essential in the mold design to facilitate the flow of molten aluminum and reduce potential defects such as air pockets or inclusions.
How to Effectively Cast Aluminum Parts: A Step-by-Step Guide - Preparation Steps for Creating Aluminum Casting Molds
| Step |
Description |
Materials Needed |
Time Required |
| 1 |
Design the part using CAD software. |
CAD software |
1-2 hours |
| 2 |
Select the appropriate mold material. |
Sand, Plaster, or Metal |
30 minutes |
| 3 |
Create the mold from the design. |
Mold box, Release agent |
2-4 hours |
| 4 |
Prepare the aluminum for casting. |
Aluminum alloy, Crucible |
1 hour |
| 5 |
Pour molten aluminum into the mold. |
Furnace, Gloves, Heat-resistant gear |
1 hour |
| 6 |
Allow the aluminum to cool and solidify. |
N/A |
2-3 hours |
| 7 |
Remove the part from the mold. |
Pliers, Hammer, Chisel |
30 minutes |
| 8 |
Finish and inspect the part. |
Sanding tools, Measuring instruments |
1-2 hours |
Melting Aluminum: Techniques and Safety Precautions
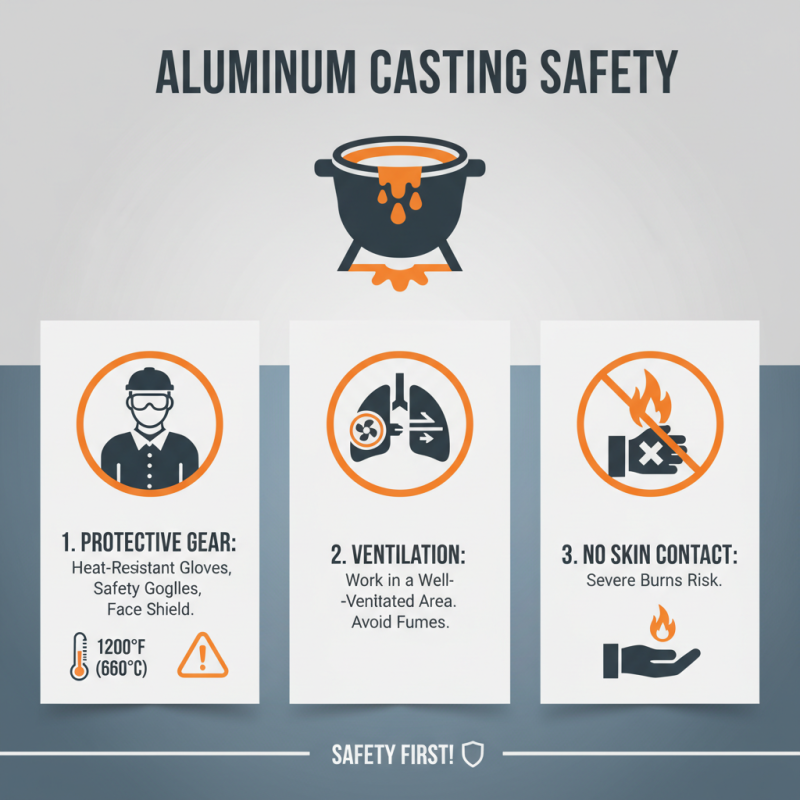
When melting aluminum for casting, safety is a top priority. First, it is essential to wear appropriate protective gear, including heat-resistant gloves, safety goggles, and a face shield. Since molten aluminum can reach temperatures exceeding 1200°F (660°C), contact with skin can result in severe burns. Additionally, working in a well-ventilated area is crucial to avoid inhaling harmful fumes released during the melting process.
Using a reliable furnace or a foundry setup specifically designed for aluminum melting is important. These furnaces provide controlled heat, ensuring the aluminum reaches the necessary temperature for effective melting. Before placing the aluminum in the furnace, ensure that the surroundings are clear of flammable materials. When the aluminum is ready to be poured, it should be done slowly and carefully to minimize the risk of splashing or spilling. Implementing proper techniques throughout the melting process not only enhances safety but also improves the quality of the aluminum parts being cast.
Pouring and Cooling Aluminum: Best Practices for Quality Parts
When pouring aluminum, the fluidity and temperature of the molten metal are critical factors that directly impact the quality of the final cast part. To achieve the best results, it is essential to carefully control the pouring temperature, typically around 1200°F to 1300°F (650°C to 700°C). This ensures that the aluminum maintains optimal fluidity while reducing the risk of premature solidification or the formation of defects such as porosity. Additionally, the pouring speed should be steady and controlled to minimize turbulence, which can introduce air into the melt and compromise the integrity of the part.
Cooling is another vital stage in the casting process. Proper cooling rates must be maintained to ensure uniform solidification, which helps to avoid warping or cracking. A fast cooling rate can lead to increased strength but may also increase the risk of thermal stress. Conversely, a slower cooling process might allow for more uniform grain structure but could affect the overall hardness. Implementing cooling channels or using chill molds can facilitate more efficient heat removal, while also allowing for better control over the cooling rate. By adhering to these best practices in pouring and cooling, manufacturers can consistently produce high-quality aluminum castings that meet stringent performance standards.
Effectiveness of Aluminum Pouring Temperatures
This bar chart illustrates the quality ratings of aluminum parts produced at various pouring temperatures ranging from 650°C to 850°C. The optimal temperature for producing quality aluminum parts is identified at 750°C, demonstrating the significance of temperature control in the casting process.
Finishing Aluminum Castings: Techniques for Optimal Results
Finishing aluminum castings is a crucial step in the manufacturing process that significantly enhances the appearance and durability of the final product. One of the most common techniques used is sandblasting, which effectively removes surface imperfections and prepares the metal for further treatments. This process involves propelling abrasive materials at high velocity onto the aluminum surface, resulting in a smooth, clean finish. Following sandblasting, applying a suitable primer helps improve adhesion for subsequent coatings, ensuring a uniform layer that protects against corrosion.
Another important technique is anodizing, which not only provides enhanced corrosion resistance but also allows for various color options, making it ideal for aesthetic applications. This electrochemical process thickens the natural oxide layer on the aluminum surface, providing a durable finish that withstands wear and environmental factors. Additionally, polishing can be employed to achieve a reflective surface, enhancing the visual appeal of the casting. Combining these techniques thoughtfully allows for optimal results in finishing aluminum castings, contributing to both the functionality and visual quality of the final products.
 +86-13516964051


 CONTACT NUMBER
 CONTACT NUMBER